You can now run multiple environments - such as Production and Staging - under the same Userflow account. This makes it possible to test flows in your Staging environment before publishing them to Production.
Setting up environments
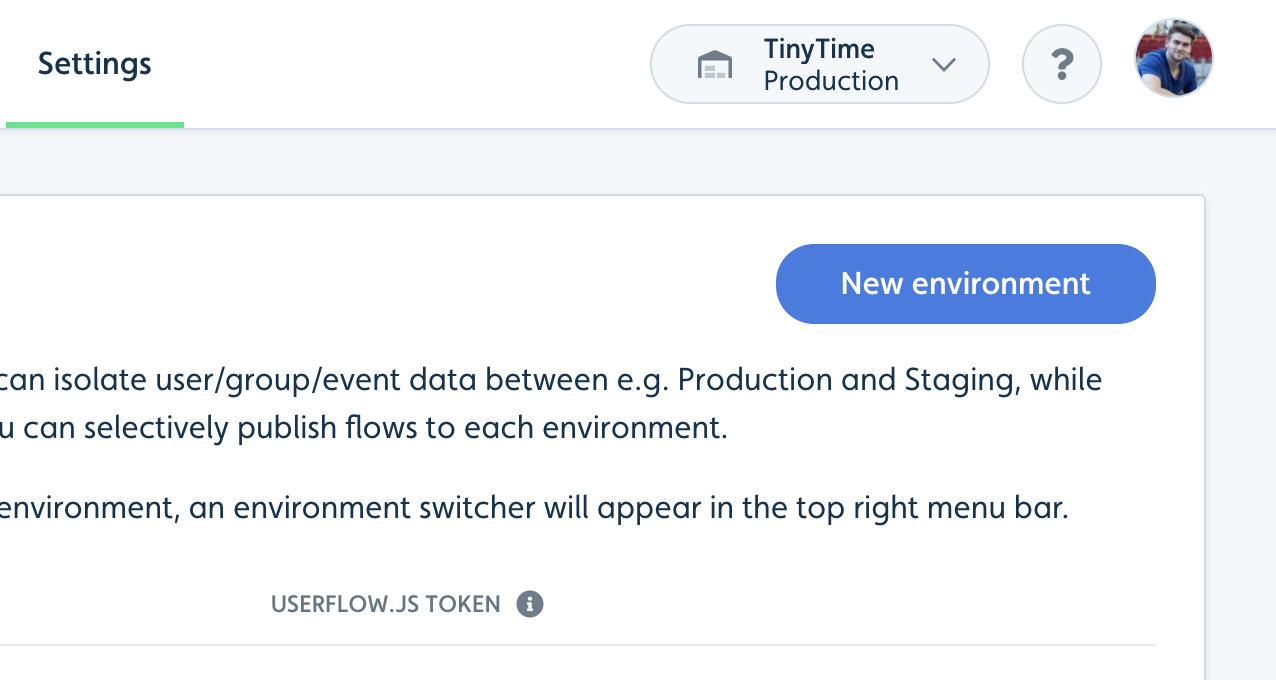
All Userflow accounts start out with a single environment, named “Production”. Under Settings -> Environments, you can add additional environments, such as “Staging”.
Once you add an extra environment, you’ll see a new Environment menu in the top right, which you can use to switch between your environments:
Each environment has its own Userflow.js Token (the one you supply to userflow.init()) and its own API keys.
Isolated user data
User data, including events and flow sessions, are completely isolated between environments. This means that your Staging users will not interfere with your Production analytics.
When you look at e.g. the Users tab, it’ll only show users in the currently selected environment.
Publish flows to individual environments
Flows, on the other hand, are shared between environments. If you have multiple environments, you can publish a flow to specific environments only. When you click Publish in the Flow Builder, you’ll now see this:
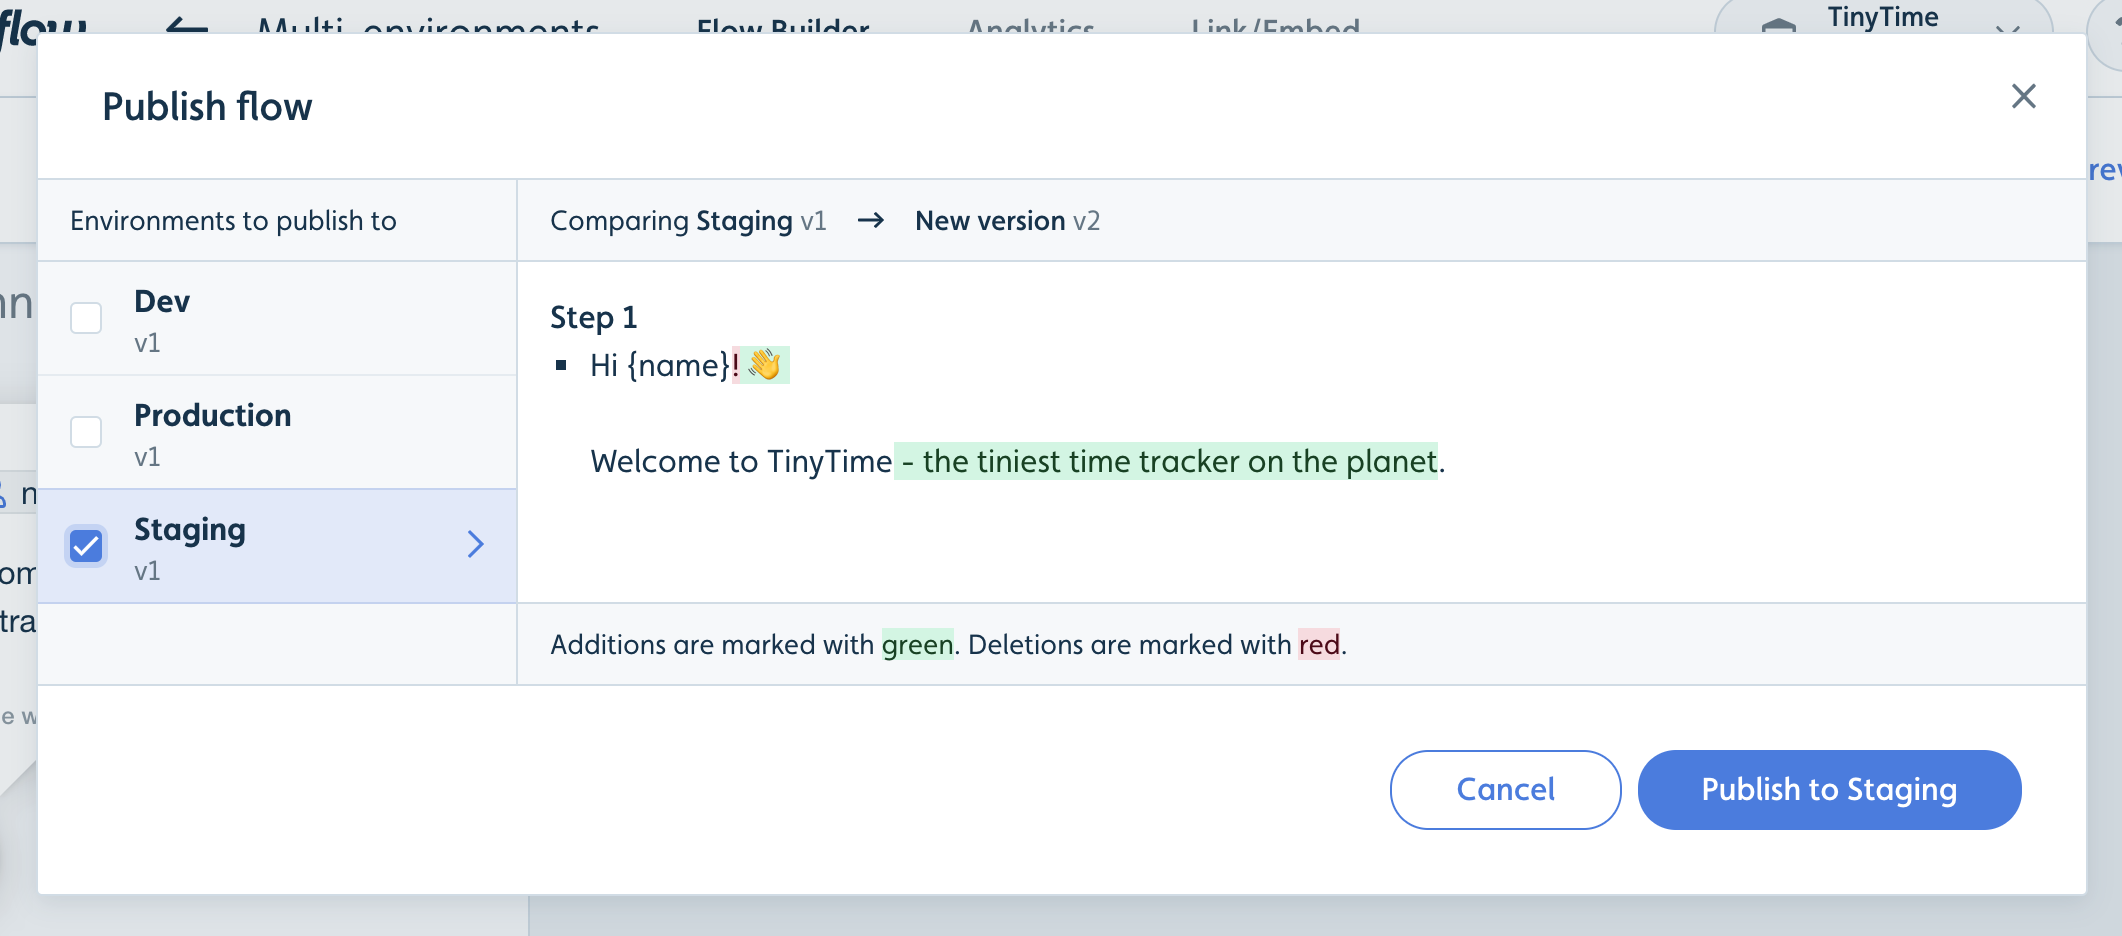
Simply check the checkbox next to each environment you want to publish to. Unchecked environments will stay on their current version.
Example use case:<br/>Test in staging before publishing to production
- Create a new flow.
- Add some content to it.
- Click Publish in the Flow Builder to open the publish flow dialog. Check only your Staging environment. Click Publish in the dialog footer.
- Go to your staging environment (in your own app) and try out the flow.
- Optionally, repeat steps 2-4 as necessary.
- Once you’re happy with your flow, click Publish in the Flow Builder again. Now also check Production. Click Publish in the dialog footer.
- Your real production users can now see the flow.